WelcomeTech We Have UsedGetting StartedDemo DeployWalletEmail ConfigurationFAQ PageContactTerms and conditionsFAQSupportChange Log
Available Scripts & Command
How Can I use this app
Features
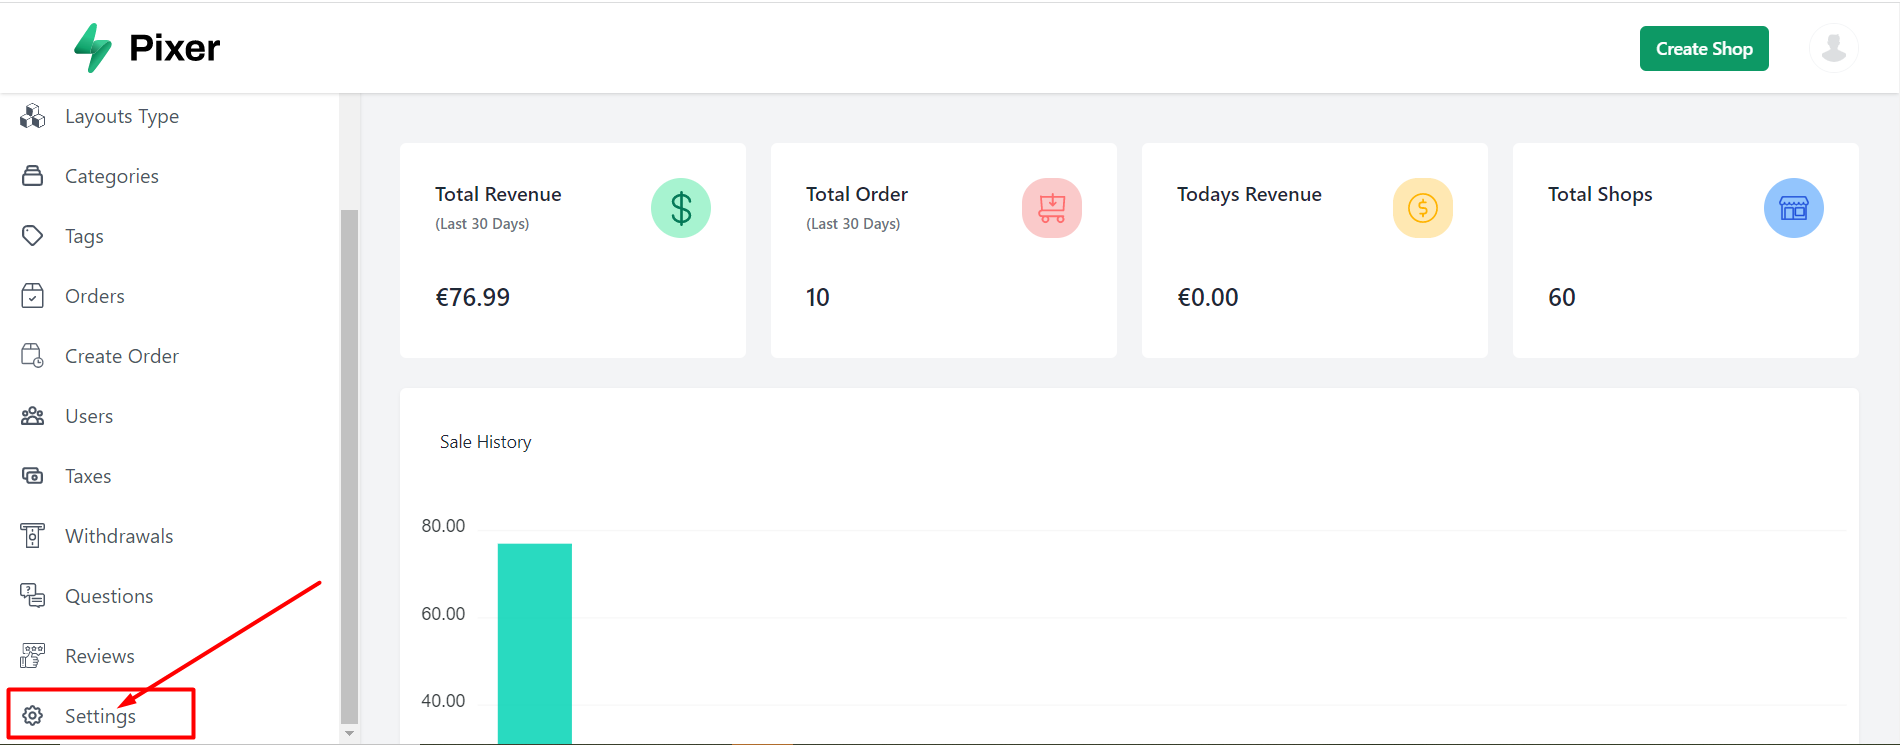
Settings
Payment
SEO and Analytics
API
Shop Transfer
Multilingual & Translation
Third-party Integrations
Deployment
Back-End Integration
Customizations
Update & Upgrade Guide
Paystack
Paystack is a Nigerian fintech company that provides online payment solutions for businesses. It offers a range of services, including online and offline payments, subscriptions, and invoicing. Paystack's platform enables businesses to easily and securely accept payments from customers via credit card, debit card, and mobile money.
Paystack integrate inside Pixer.
Please follow & complete this steps for Paystack integration for your e-commerce system.
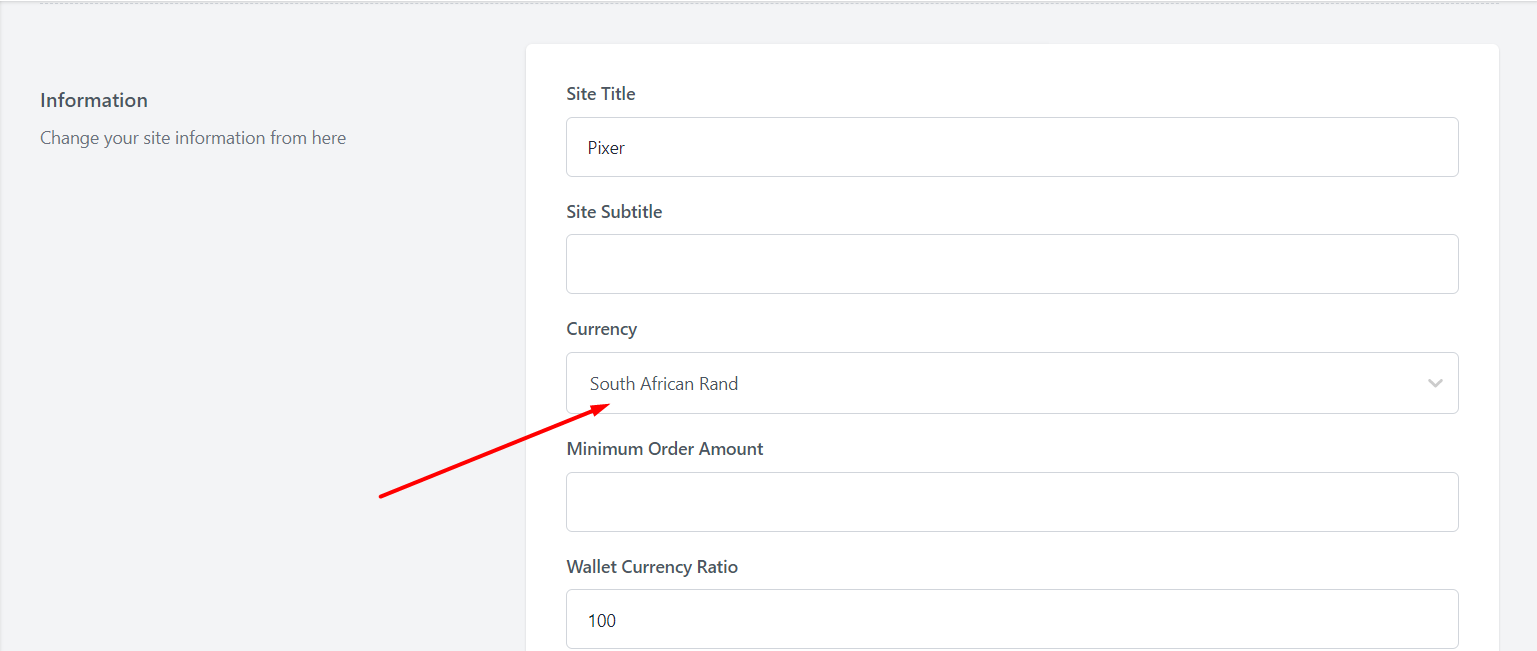
- First go to settings from Pixer admin dashboard. Inside settings you will find Currency option.Select your Currency. If you want to Test development on localhost.then Select South African Rand(ZAR).
Here is a breakdown of countries and the currencies they can accept payments in.

For more information: Paystack currency is available.
- Inside api there is
.envfile. You have to copy & paste this line of codes inside the.envfile. We will discuss later about how to create those API keys in Paystack official website.
PAYSTACK_PUBLIC_KEY=[YOUR_PAYSTACK_PUBLIC_KEY]PAYSTACK_SECRET_KEY=[YOUR_PAYSTACK_SECRET_KEY]PAYSTACK_PAYMENT_URL=https://api.paystack.coMERCHANT_EMAIL=[YOUR_PAYSTACK_MERCHANT_EMAIL]
- Add Paystack publishable key inside Pixer shop.
NEXT_PAYSTACK_PUBLIC_KEY=[YOUR_YOUR_PAYSTACK_PUBLIC_KEY]
Paystack Webhook settings
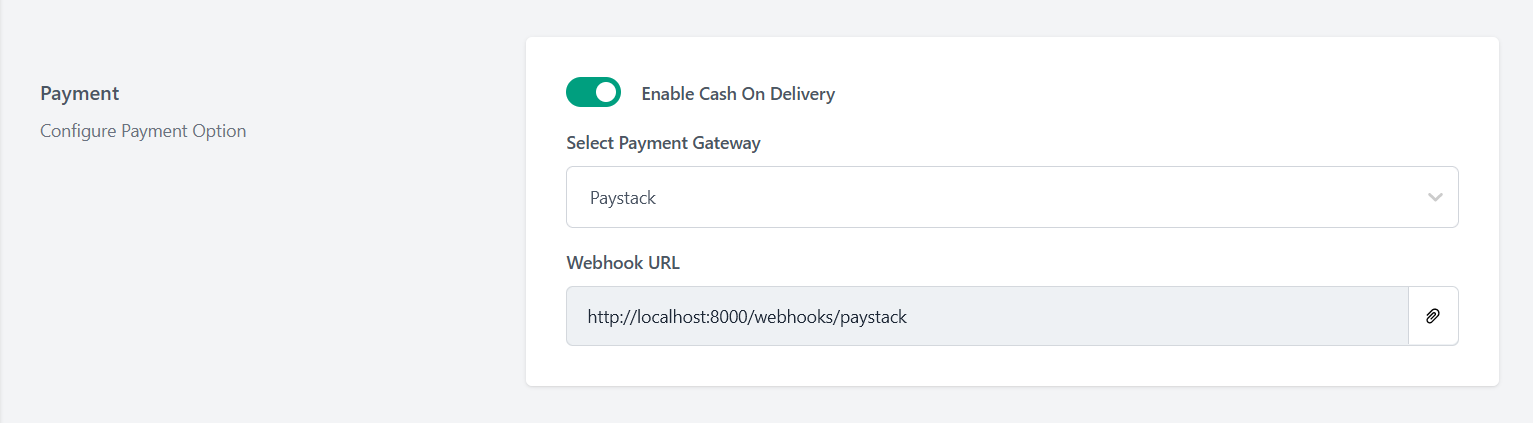
- To activate Paystack go to settings from Pixer admin dashboard. Inside settings you will find configure payment option. (e.g. Paystack Webhook URL is coming from local development. This static link will dynamically generated in live environment)
- Copy the webhook url & registered in Paystack Dashboard.
- If you want to use webhook during development on localhost, you must use a tools like ngrok to have the webhooks delivered to your local machine.
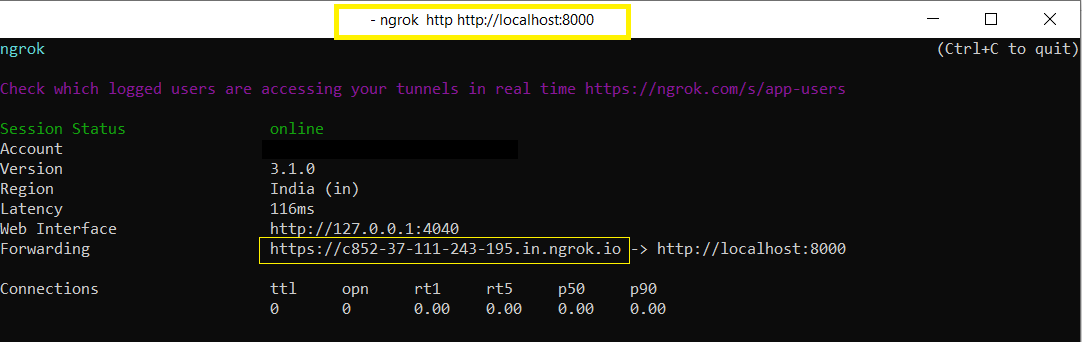
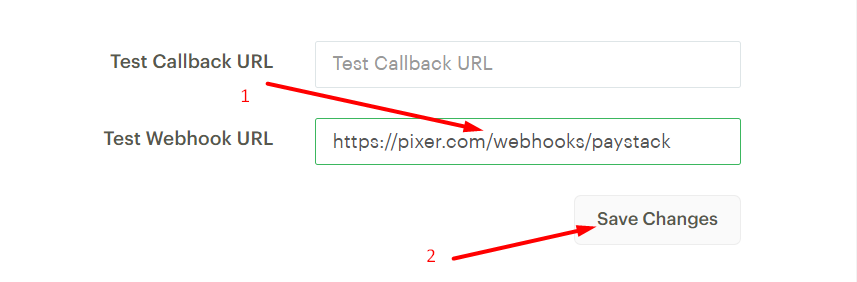
- Copy the forwarding https link & paste on Test Webhook URL, after paste forwarding https link, add line- /webhooks/paystack.

How to create & setup Paystack information properly?
- Go to the Paystack official website & login If you aren't a registered user, Complete the Paystack registration first.
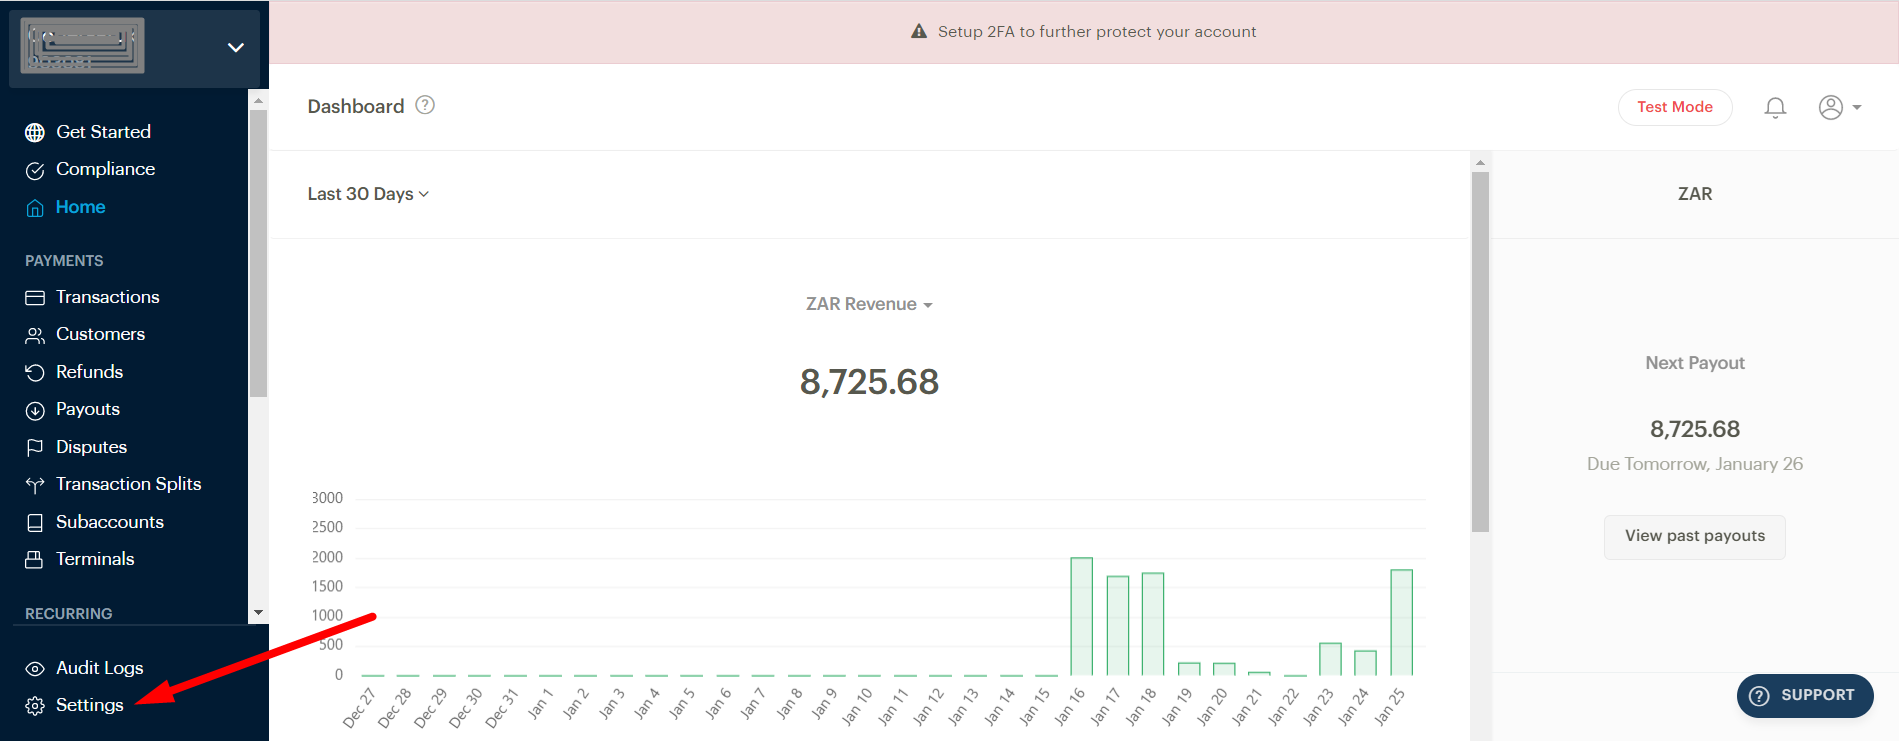
- After logged in into Paystack dashboard, Click on Settings.
- After That Click on API Keys & Webhooks for Paystack Secret Key & Paystack Public Key.
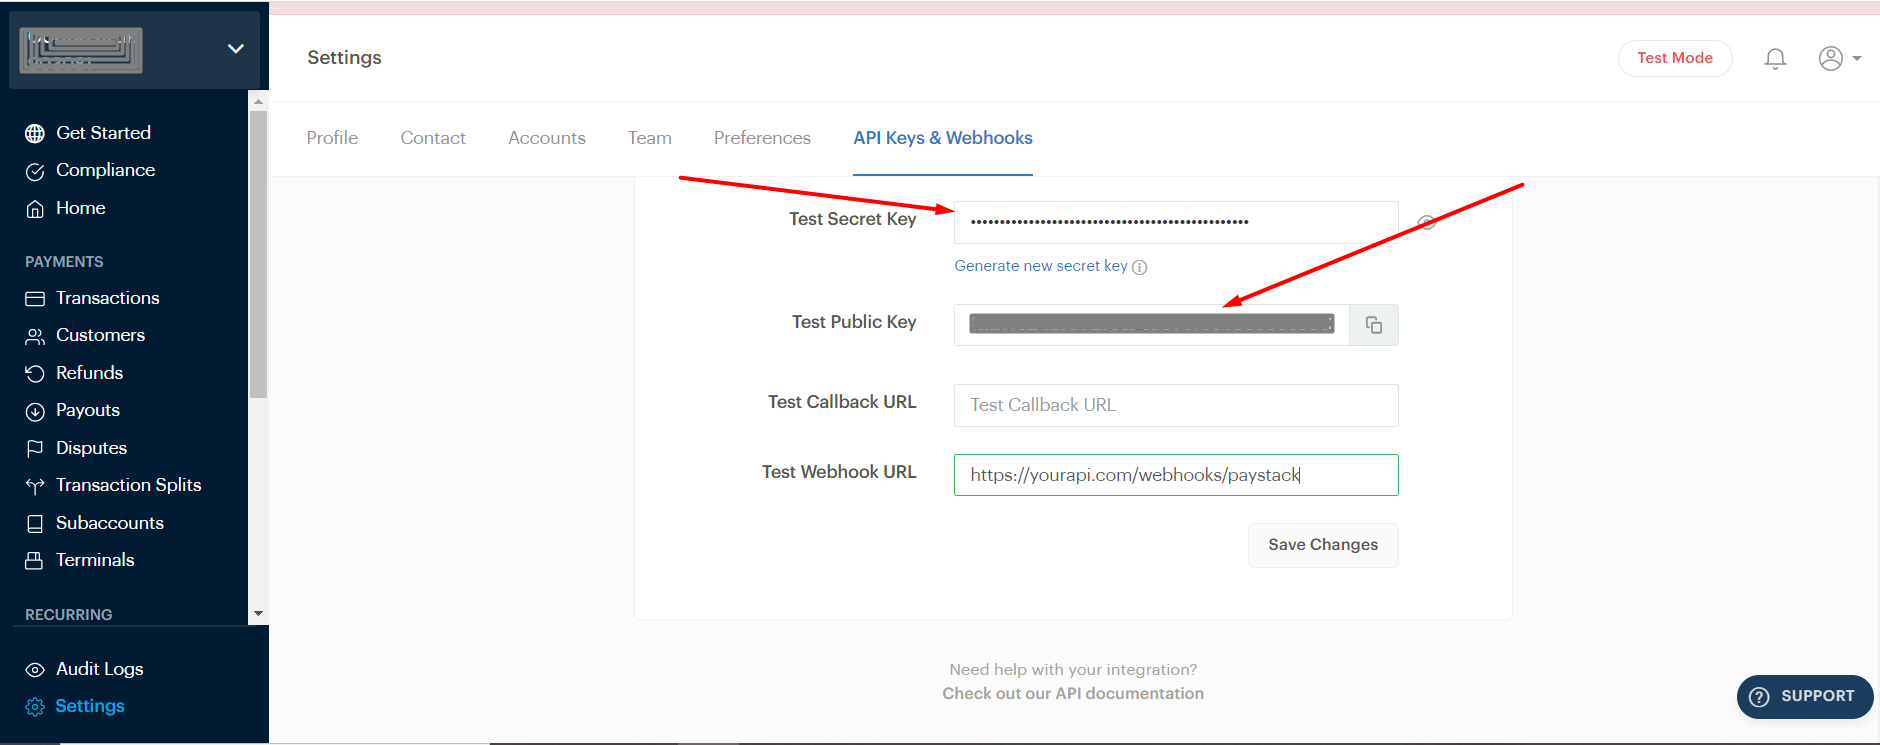
- Copy & paste those inside Pixer API and Pixer Shop
.envfile like mentioned above.
Special Notes for Paystack.
If we have used any third party system/plugin/packages, then we have always encouraged our respected customers to follow the official documentation for detailed & in-depth knowledge.